
The thinktankphoto speed series is an interesting line of bags. They’re belt bags, they’re shoulder bags, and they’re a combination of both. ThinkTank uses a nice soft webbing loop to attach the shoulder strap to, so it’s easily removable. They also include belt straps that tuck neatly away into the side of the bag. So it’s really up to you as to how you can use it. But what I’ve found, is using both makes it for an excellent outdoor shoulder bag for landscape shooting. If you’ve followed my reviews in the past, you know how well I like the retro 5. I still use that bag, but it’s now my family/portrait/prime bag. The Speed Demon has completely replaced the retro 5 as my landscape bag. Why? Because with the belt strap in position, it sits where I put it as I’m moving around to get a composition I want, or when hiking in or out of a location. But because it’s a shoulder bag with belt straps, it’s also very easy to swing the bag around where I need it to grab something, then swing it back around to the back. The combination of straps also allows me to distribute the weight of my kit between my waist and my shoulders.
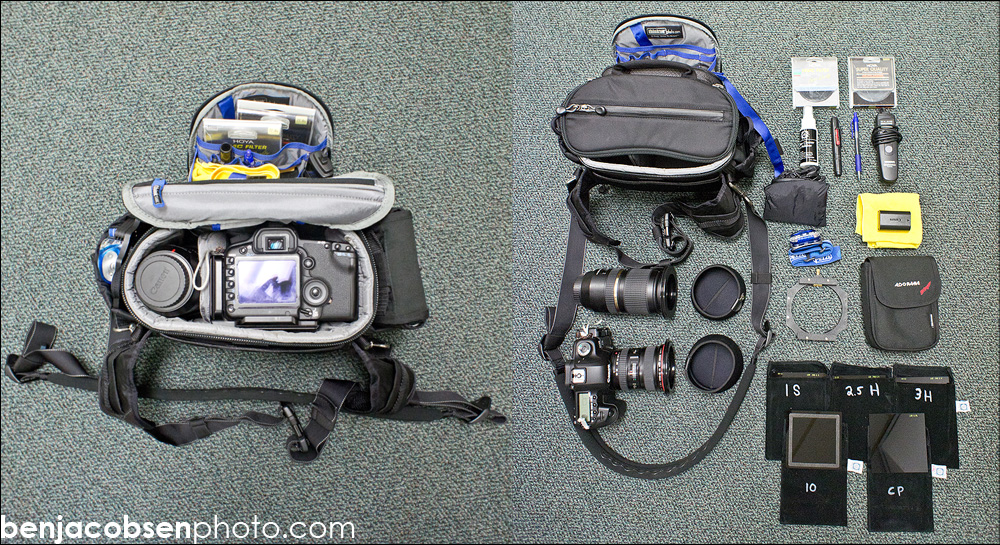
Here you can see my bag as I load it for landscaping, roll over the image to see everything labeled:
The first thing to realize when you start looking at this series of bags is there are three different sizes, and they go by names instead of a model number that would help you sort out what’s going on just looking at the names.
- Small: Speed Demon
- Medium: Speed Freak
- Large: Speed Racer
Originally I had the Speed Freak you see in the review. I then found out my buddy Shawn Thompson had a Speed Racer which I mistakenly thought was the smaller size. I asked Shawn if I could borrow it and had it in the review as well. I then realized I wanted the Speed Demon personally, and ordered that as well. Long story short, I’ve tried all three sizes of this bag. The Speed Freak and Racer are great if you want to bring along a LOT of things. The speed demon is much smaller and better for a minimal kit. I have my filters, 17-40 (on my 5Dii), 70-300 and some accessories in the demon and it’s FULL. I wanted it this way because I plan on skiing with this bag this winter (in a chest mount configuration, details to come this winter) so I want it as compact as possible. If I were only going to use this bag for landscaping I’d go with the freak. The Racer seems like it’d be the best bet if you wanted to use this bag with a 70-200 type lens. Both the Freak and the Racer fit pro series bodies where the demon doesn’t really.
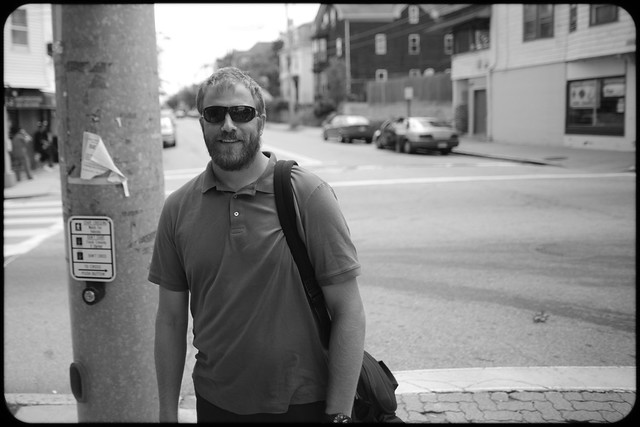
Here’s a shot of me wearing the bag in “shoulder” mode:
OK, now on to what I like and don’t like about this bag. One of the first things I’ll address is the top zipper as I know it gets a lot of attention from some people checking out the bag. Their criticism is that you can’t really use it to get at your camera. This is true. But I don’t think that’s the purpose of the zipper (because it doesn’t work that way). Personally, I use mine to grab things in my bag once I’m shooting. Basically, once I get to where I’m shooting, the camera and one lens are on the tripod the majority of the time. So I can put some accessories in the area where the camera is when being transported. These accessories would live in the front pouch while traveling, but once I’m setup, it’s nice to have that front pocket zipped. For example, say I’m shooting waterfalls and there’s a lot of spray. I’ll leave my lens cap and lens cleaning cloth in the main compartment. If I’m waiting on light, I’ll toss the lens cap back on the body and drop the filter holder into the bag. Or if a filter gets wet, it’s very nice to be able to just reach in and grab the cloth to clean it. The advantage here is with the shape of this opening, nothing can fall out of it (where it could if you left the front pocket open and leaned over). The other thing I like about the bag is the belt straps. They have webbing on the side so you can add modular bags as you see fit. I’m a huge proponent of getting a smaller bag for your typical use, then adding modular components to that bag only when you need the extra space. It makes life very easy. The way the top lid flips away from your body when opening it is also great, this helps to “catch” things that you might have missed putting in the bag (lens caps etc). The front pocket also has gusseted keepers that keep it from coming all the way open when unzipped which is very nice. And of course it comes with an excellent rain cover.
Here’s a shot of me wearing it using both the shoulder and belt straps while landscaping:

The changes from the old version to the new version (from what I can tell) are as follows. The camera insert is removable in the old bags (leaving you with a giant empty space and no padding). That also gave you some hidden storage areas between the camera insert and the exterior of the bag (good for papers but nothing bigger). The interior/inserts are now a bluer gray, where the old version was greener gray (not really anything you’d notice unless you had two side by side). The buckles on the new version seem a bit smaller and more, delicate? They’ve gone w/o triglides on the new straps as well (which I added back to it). The storage spot that’s against your hip when you’re wearing it is now larger and more open (it was specifically shaped for a note pad and pen before). The new shoulder strap is 1 piece and has rubber grippers on it, the old one had an add on to make it less slick. The old version came with a pixel pocket rocket FOR FREE, the new one does not (but if you order using my links you can get this for free anyway!!!). The zipper at the top looks a bit different. That’s about it though, that might seem like a long list, but it’s not and the bags are VERY similar.

- Small: Speed Demon
- Medium: Speed Freak
- Large: Speed Racer
Yes I AM an affiliate and I do get these bags for free for my reviews. But I will say, I also buy some of my bags from thinktank myself, and in this case they sent me one size, I liked it enough I bought the other size myself for my personal use. My current active bags are my retro 5 for portraits/family shooting, my speed demon for landscapes and architecture and my lens changer 3 for wedding photography. Even if I was not an affiliate of thinktank, I’d use these same bags. When you use my affiliate link to purchase your bag, you get a FREE GOODIE (I highly recommend their pixel pocket rocket!) and you help support this site so I can bring you more reviews.


Leave a Reply